Measuring dark current.

Modern cars with lots of electronics always have battery drainage even the engine is off. Electronics will go to sleep mode, but it will still consume a little. I have designed many electronic accessories and decided to check if there is any effect on battery life. My test car is the 2017 Mazda MX-5 RF Launch Edition. It has a SmartTOP module installed as well as my front camera kit, ACC controller, and automatic footwell light.

Measuring current accurately is a little tricky because any circuit interruption will wake up all electronics again. Also range from 10A to milliamps. To avoid these issues, a circuit switch is really handy. I found a good option on Amazon. Because I’m often testing new electronics, I found that having this device installed is time-saving.

Now, when the switch is in position “Power on” I can safely attach the multimeter and after 2 minutes switch can be disconnected and a small current will go through the tester.

When car is unlocked, current stays about 100mA

The proximity of Key Fob seems to have no effect on this test, however when the car was locked, this current drop to about 15mA, which is a very little drain.

This means if the car is unlocked for a long time, it will drain the battery faster.

OBDII Headlight Initializer Dongle

Recently I got a request through my Request and Wishlist forum page about making a simple dongle for initiating auto-leveling headlights. Why would you need this? According to Mazda Workshop manual:

  • Perform headlight auto leveling system initialization if any of the following services is performed:
    • Auto leveling control module/AFS control module replacement
    • Auto leveling sensor replacement or removal/installation
    • Any service which changes vehicle height, such as suspension replacement or removal/installation

Technically you can do this with simple wire jumper, as suggested in that manual:

  • Perform Steps 4 and 5 within 30 s.

1. Empty the vehicle except for the jack and vehicle tools.

2. Adjust the tire pressure to the specification.

3. Move the vehicle to level ground.

4. Switch the ignition ON (engine off or on).

5. Using a jumper wire, connect DLC-2 terminals B and J (ground) three times at 0.5—1.5 s intervals as shown in the figure. (If the terminals are mistakenly connected, vehicle damage or fire could occur. When connecting with the jumper wire, thoroughly verify what terminals are being connected to prevent a miss-connection.)

  • The initialization is completed if the LED headlight warning light flashes three times every 0.25 s and turns off. Go to the next step.
  • If the LED headlight warning light flashes at 0.25 s intervals, the procedure may have been performed incorrectly. Repeat the procedure from Step 4.

6. Verify the LED headlight warning light.

To make this process less stressful, I added little electronics for OBDII connector, which produced 3 stable pulses after a single click on the button.

This dongle is available for ordering here

Front Camera kit updated

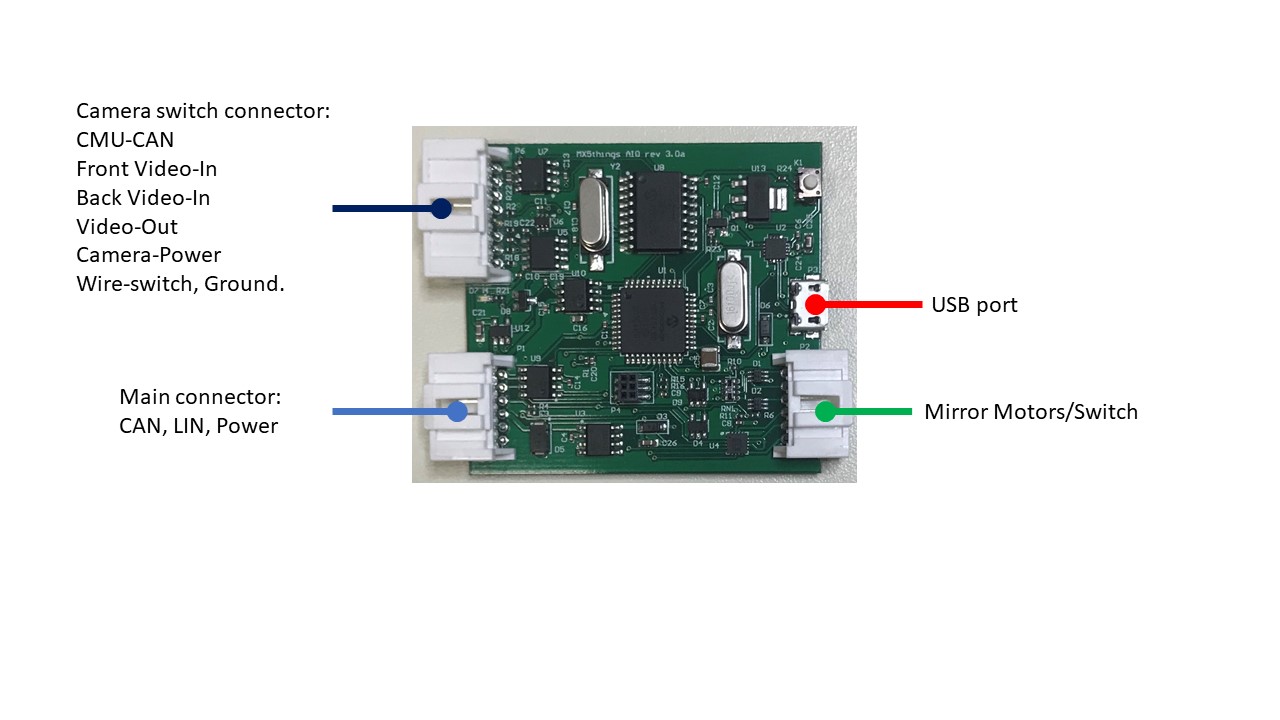
Since the initial release of the Front Camera kit, I have collected feedback from customers and decided to release a second version.  Bug fixing and adding new features is an ongoing task and to make it possible to update software on site, a new USB port was added. Now software can be uploaded from a MS Windows computer via USB cable at any time.

aoi2All software features and default settings can be enabled or disabled through the same application:

app

There was some issue with the Smart Mirror feature. Because we can’t get the absolute position of the mirror, we have to rely on moving time during initial setup. This is not a very accurate method, because sometimes motion up is a little slower than moving down. To compensate for these errors,  new software has correction coefficients for each direction. These coefficients are now possible to enter using this new application via USB cable.

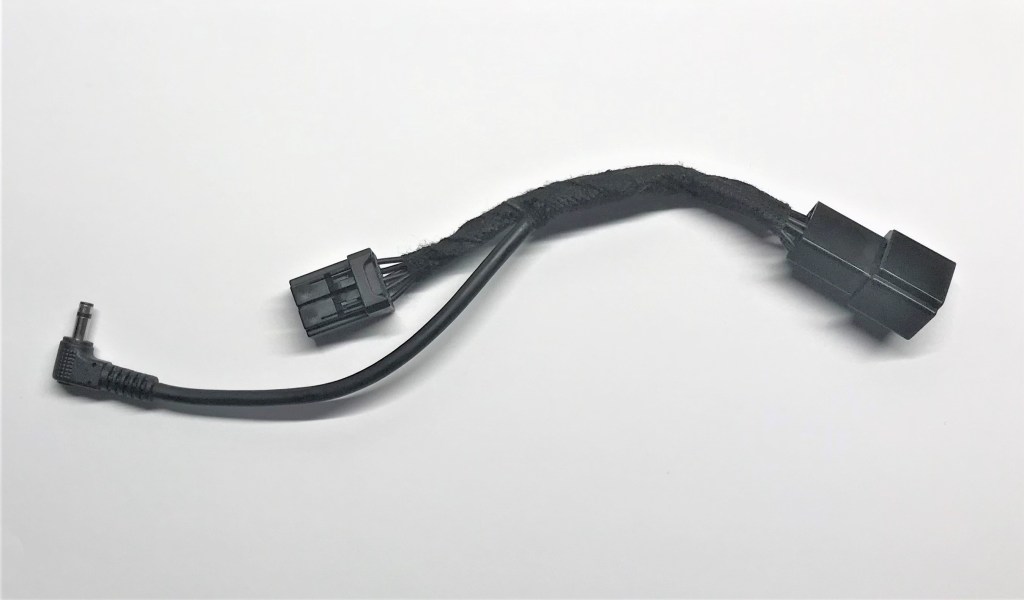
Another improvement was done to the main harness. To make installation and access to the module easier, the cable has been extended 15″.  The front camera cable now has direct connection to the module via 4pin connector.

Notes about using the “Mute” button for activating Front Camera:

If you press “Mute” to activate the front camera and you want to continue listening to the radio, just turn the volume knob a little. It will exit from mute for radio but the front camera will stay on, until you press the Mute button again.

It was reported that using the Mute button will interfere with CMU updating procedure. However inference is minor. After pressing three buttons combination (Music+Mute+Fav), CMU will switch to front camera. After about 5 seconds, CMU will switch to debug mode and will show normal interface again.

See updated Installation guide

Updated kits now available here.

Automatic Roll-Up Windows – Part 2

My windows switch modification for automatic roll-up windows became a very popular mod among Miata enthusiasts. However, the original modification, for most people, was somewhat difficult due to high precision soldering. To make it more accessible, I designed an external controller with a wire harness, which is now an easy plug-n-play setup.

Continue reading

3rd Brake Flasher – Part 2

My initial blog  3rd Brake Flasher was about using an accelerometer and plug-n-play setup, with a low-cost popular GS-100A flasher.  I got a few requests about an option without an accelerometer, but with some delay feature, so it would not be so annoying in stop and go traffic. The challenging part of such a design is there isn’t constant power. Power is available only during brake application.  To solve this,  I have added a couple of big capacitors to my design and optimized it for very low power consumption, so the microprocessor can stay powered for an extra 10-15 seconds after every brake application.  The 3rd brake light will blink 4 times after the initial brake application.  If intervals between brake applications are less than 10 seconds, it will simply pass through brake status.

diagram

This design option is available from my store.